

Creating and managing virtual machines (VMs) is an essential task for system administrators and developers, especially when it comes to resource optimization and software testing. In Linux environments, one of the most powerful tools for virtualization is Kernel-based Virtual Machine (KVM), a full virtualization solution that leverages the Linux kernel to create and manage VMs. KVM is known for its high performance, scalability, and efficiency, making it an ideal choice for running multiple virtual environments on a single physical host.
Our guide on creating virtual machines in Linux with KVM provides a step-by-step overview of how to set up and configure virtual machines using this robust virtualization technology. KVM uses the hardware virtualization extensions of modern processors (such as Intel VT-x or AMD-V) to enable high-performance virtualization, and it integrates seamlessly with Linux distributions.
This guide is designed for Linux users, system administrators, and IT professionals who want to leverage KVM to maximize their infrastructure’s potential, whether for development, testing, or production environments. We will walk you through the installation of KVM, the creation of virtual machines, and the management of virtualized environments using both command-line tools and graphical interfaces like Virtual Machine Manager (virt-manager).
With clear instructions, this step-by-step guide covers essential tasks such as configuring virtual CPUs, allocating memory, managing storage, and configuring networking for virtual machines. We also highlight the benefits of using KVM over other virtualization technologies, including its open-source nature, its tight integration with Linux, and its ability to run on a wide range of hardware.
For Linux users looking to streamline their virtual infrastructure or explore virtualization for the first time, this guide offers valuable insights and practical advice for creating and managing virtual machines effectively. By mastering KVM, organizations can achieve greater flexibility, efficiency, and control over their IT resources.
Preparation
Requirements:
- Root access
Packages:
- qemu-kvm – The main package
- libvirt -The libvirtd server
- libvirt-client – Contains virsh and other utilities
- virt-install – Install virtual machines
- virt-viewer – Display console for virtual machines
Setup
The very first thing you need to do is check that the CPU has support for virtualization. Nine times out of ten your CPU will have this, but you still need to check to make sure. To do this enter the following command:
$ cat /proc/cpuinfo
Once you’ve entered this command you want to scroll through the list of results until you see CPU ‘flags’. The flags you’re looking for are named svm and vmx. svm is if you are running an AMD processor and the latter is if Intel is the manufacturer.
Next you need to make sure that all the necessary kernel modules have been loaded. To check this, run the following command:
# ls mod | grep kvm
kvm_intel               200704     0
kvm                       598016      1 kvm_intel
irqbypass             16384        1 kvm
In the example above the kvm and kvm_intel modules have been loaded. It is important to note that if you’re using an AMD processor then you will see the kvm_Amd module instead. On some occasions, modules won’t load automatically. If this happens you can load them up manually by using the following command:
# modprobe kvm_intel
To finish the setup you need to load the libvirtd daemon. To launch the libvirtd daemon you need to enter the following command:
# systemctl enable --now libvirtd
Creating a Virtual Machine
Now that we’ve taken care of the initial setup it is time to create and configure our virtual machine. To do this we need to enter the virt-install command:
# virt-install --name=linuxconfig-vm \
--vcpus=1 \
--memory=1024 \
--cdrom=/tmp/debian-9.0.0-amd64-netinst.iso \
--disk size=5 \
--os-variant=debian8
There’s a lot going on in the command above, and the various options can be identified as follows:
- –name option – Assigns a name to the virtual machine
- –vcpus – Specifies the number of CPUs to be configured
- –memory – option used to determine how much memory is available for the guest machine in MiB and —cdrom
- –disk – Used to determine media storage for the guest. You can use the size option to determine the size of the virtual disk and path to specify the path to be used for the disk. If no path is selected the disk can found at $HOME/ .local/share/libvirt/images
- –os-variant – Used to configure the guest towards one OS version. If you’d like to view all supported systems you can also enter this command: $ osinfo-query os
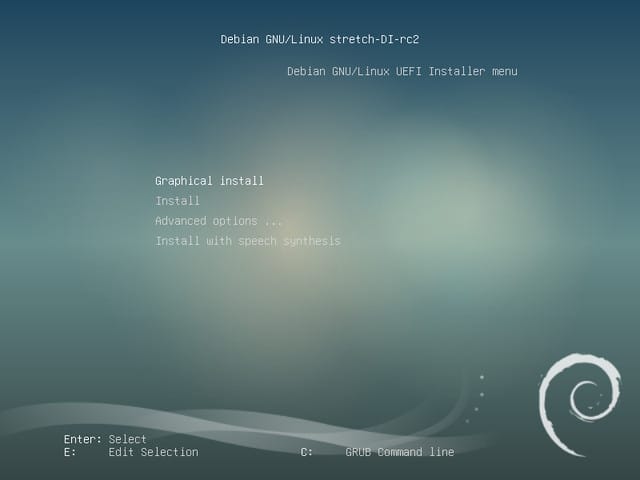
Once this is done the virt-viewer package will be installed and the guest OS installer will be launched:
Related post: Docker vs Virtual Machines
Interacting with Virtual Machines with the Virsh Utility
The virsh utility is one of the best ways to interact with your virtual machines. To start using the virsh utility you need to check how many configured guests there are available. You can do this by running the following command:
# virsh list --all
Entering this command will show you the id, name, and state of configured guests (including whether they are active or not.) The virsh command can be used a number of ways, for example:
- virsh shutdown – shuts down the guest
- virsh destroy – Shutdown the guest via brute force
- virsh undefine – Delete a guest machine
- virsh edit – Edit machine parameters
Here we’re going to look at how you can change machine parameters:
# virsh edit linuxconfig-vm
If you’d like to increase the number of VCPUs you need to use the following command:
<vcpu placement=‘static’>1</vcpu>
To increase the number of machines you would enter:
<vcpu placement=‘static’>2</vcpu>
To make the changes, you need to reboot the virtual machine. To do this enter the following:
# virsh reboot linuxconfig-vm
Starting Virtual Machines on Boot
There are many guests that you will want to have available upon startup. By using the virsh command you can make sure that you have your virtual machines available on boot. To do this you need to enter the following command:
# virsh autostart linuxconfig-vm
If you want to deactivate this command at anytime you can enter this:
#virsh autostart --disable linuxconfig-vm
Cloning Virtual Machines
Rather than creating new virtual machines all the time, you can also clone existing machines. To do this you need to enter the following command:
virt-clond \
--original=linuxconfig-vm \
--name=linuxconfig-vm-clone \
--file=/var/lib/libvirt/images/linuxconfig/vm.qcow2
The options of this command are:
- –original – The name of the guest that you want to clone
- –name – The name of the new guest
- –file – Used to refer to the virtual hard disks that you want to clone. Once the command is successfully completed a new domain will be created called linuxconfig-vm-clone
To verify the domain you would enter the following command:
# virsh list --all
Final Words
Setting up a virtual machine with KVM doesn’t need to be complicated if you familiarize yourself with the fundamentals. In this article, we’ve just configured the basics but as you become more experienced you can add more parameters to configure your virtual machines more effectively. For now, these settings will get you off the ground and ready to enter the world of KVM virtual machines.
See also:

