You’ve probably heard that Kodi is extremely customizable. Most users simply install a handful of addons, maybe change the colors or background art, and call it a day. However, with a few changes to the settings, you can drastically increase the flexibility of your home media system using Kodi’s web interface.
So how can this help you? Well, with the web interface, you can control Kodi from another device entirely (provided both are on the same network). This is helpful, for instance, if you have Kodi on your Amazon Fire Stick but can’t find the remote for it or if you feel like skipping certain songs while in another room.
Below, we’ll explain how to set up Kodi’s web interface and what you can do once connected. And don’t worry if you’re new to Kodi: this guide is suitable for experienced users and complete beginners alike.
Always use a VPN with Kodi
Your Internet Service Provider (ISP) can see everything you get up to online. This is how it’s able to sell details of your activities to advertisers and reduce your speeds whenever you try to stream or torrent. This isn’t great from a privacy or usability perspective, and you may even be paying for higher speeds than you’re getting.
That’s where a good Virtual Private Network (VPN) can make all the difference. These services encrypt your data, preventing it from being read and stopping anyone from telling what exactly you’re doing on the internet. Still, some VPNs are too slow to really be useful, and others lack basic security tools, so it’s vital you choose wisely.
We recommend NordVPN because it’s extremely fast, boasts a huge range of security and privacy tools, and works with just about every Kodi addon and streaming service we’ve tried. Plus, it has its own Amazon Firestick app and comes with a 30-day money-back guarantee, meaning you can try it risk-free.
Want to know more? Check out our detailed NordVPN review.
How to set up the Kodi web interface
Before we can begin controlling Kodi from another device, we first have to enable this in the settings. Just follow the step-by-step guide below.
Here’s how to set up the Kodi web interface:
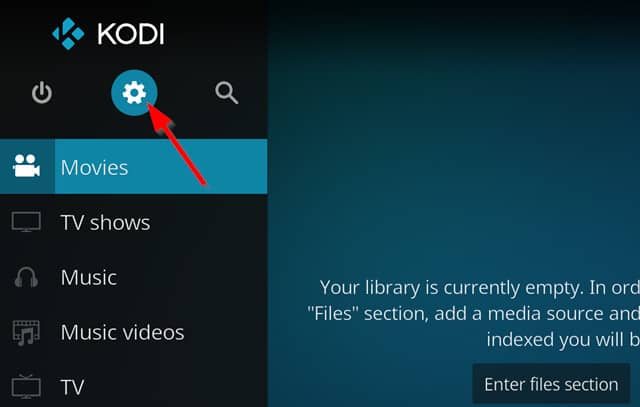
- From Kodi’s main menu, select the gear icon in the upper-left
- Select Services
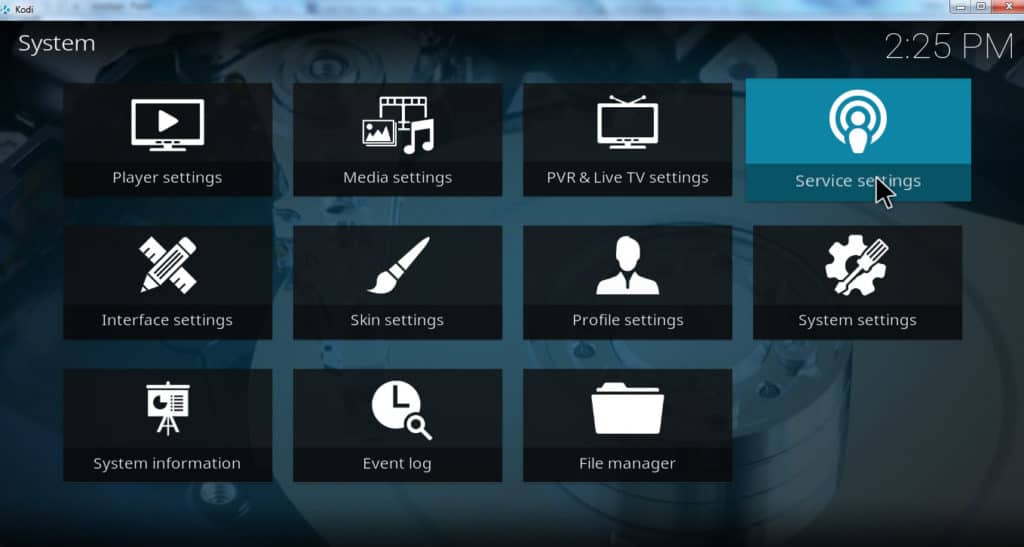
- Click the gear in the bottom corner until it says “Expert”, then move your cursor over Control

- Move the slider for Allow remote control via HTTP to the “on” position

- Take note of the port number listed. This is usually 8080 by default
- Kodi now requires users to enter a username and password to prevent unauthorized access to your media. Enter these into the appropriate boxes
- Make sure that ‘Allow remote control from applications on other systems’ is checked
- Return to Kodi’s settings menu and click on System information. Make a note of the IP address shown here
- Open a web browser on your second device. Type in the IP address you noted down previously, followed by “:” and the port number. The whole thing should look like this: “123.123.123.123:8080” (without the quotation marks)
- Enter your username and password, then simply use Kodi as normal
How to use the Kodi web interface
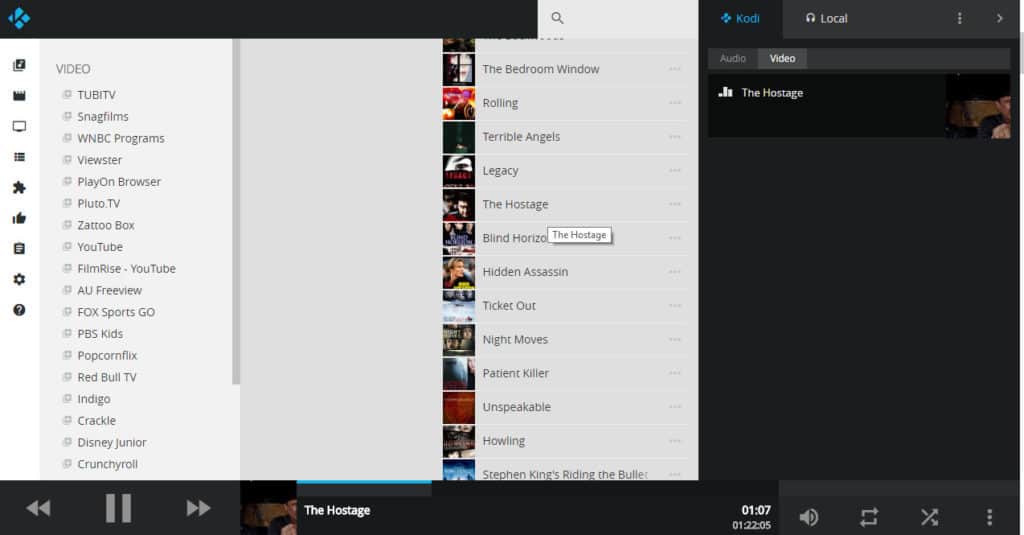
When you first open the Kodi web interface, you’ll see a list of icons on the left side of the screen. These are essentially the same ones available in the Kodi app, just streamlined and delivered in a way that’s easier on the eyes.
You should be able to do any action you normally would on Kodi, from changing settings to playing content from addons. Note that if the screen appears empty on a mobile device, you can click the three dots next to the Kodi logo to show the full list of content.
How to use the Kodi web interface to stream music locally
If there is music stored on your Kodi device that you want to listen to on the controlling device, you can set up a “local” playlist. This is useful, for example, if you want to listen to music through your laptop headphones so as not to disturb others.
To get started, simply find a song you’d like to hear and click on it. There’ll be a few buttons here: clicking Play will play the song on whichever device is running Kodi. Clicking Stream will play it on the device you’re currently using.
The playback controls are a little bit janky, so we’d recommend creating a playlist rather than trying to manually pick and choose songs individually. While you can fast-forward and rewind tracks, there’s no easy way to stop or skip them.
Note: This feature does not work for videos or even music addons. Only music files stored on your Kodi device can be streamed over the wireless network through this feature.
Arch: An alternative Kodi web interface
The instructions given above are for the default “Chorus2” Kodi web interface, but Kodi also provides an alternative web interface for users that don’t like the default option. This alternative interface is called “Arch.”
To enable Arch, click on the gear icon from the main menu, then select Services → Control → Web interface → Arch.
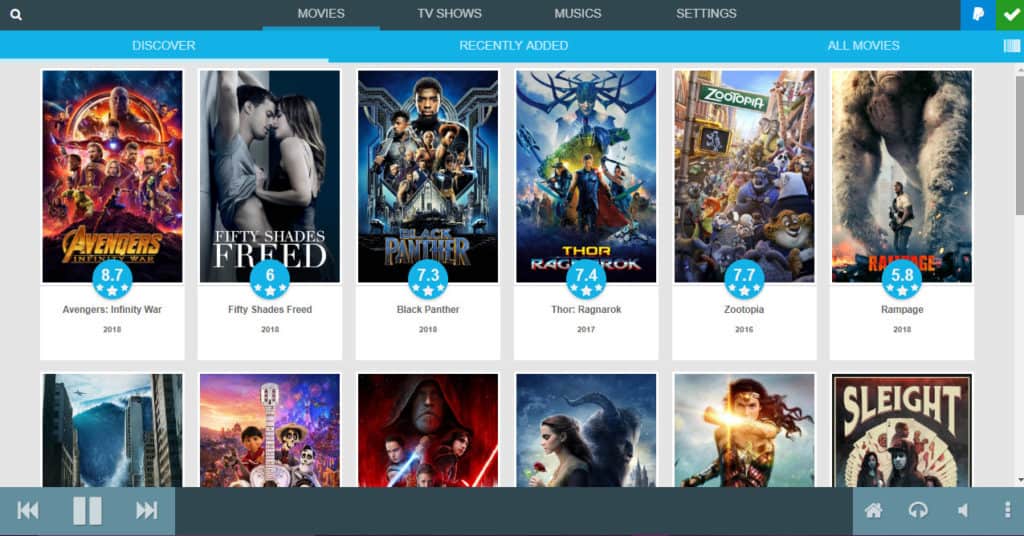
Unlike Chorus2, Arch does not provide access to all of your addons remotely. However, it does provide remote access to all of the content stored on the device. So if you only use the web interface to play content you’ve downloaded or produced yourself, Arch may be just as good for you as Chorus2.
In addition, Arch provides a “discover” feature that scrapes content from one addon of your choice, using title information from Pulsar. By default, the addon selected to scrape is YouTube.
In my own testing, I found that this feature provided a list of the latest blockbuster films. However, clicking “play” only produced a trailer, not the actual movie.
Arch can be configured to use an addon other than YouTube. And if this addon provides access to streams of the latest Hollywood movies, the “discover” function will allow you to play these movies. However, this is unlikely to happen unless you are using a third-party addon that provides unlicensed streams of content. We do not recommend using addons that stream unlicensed content.
Kodi web interface: FAQs
Why can't I connect to the Kodi web interface?
It can be frustrating when a seemingly simple feature doesn’t work as expected first try. There’s no need to worry, though; while there are a few potential reasons you can’t access the Kodi web interface, they’re all fairly easy to resolve. Here are just a few possible culprits:
- You have forgotten to enable Allow remote control from applications on other systems in the Kodi services menu
- The system running Kodi has a firewall blocking connection attempts from other devices
- You have entered the IP address or port number incorrectly (it pays to double check since switching networks or restarting changes the address)
- The username or password is incorrect
What type of content can I watch on Kodi?
There are Kodi addons for just about every imaginable type of content. We’d suggest having a look through the official Kodi repo to see if anything catches your eye. Alternatively, check out our guides to the best sports, news, and movie addons.
Can I access the Kodi web interface on my iPhone?
Yes! Once you’ve set up Kodi’s web interface, you should be able to access it from any device on the same network, regardless of whether it’s an iPhone, tablet, laptop, Amazon Fire Stick, or even a Raspberry Pi.
In other words, this is a great way to use Kodi on devices that don’t normally support Kodi, like Smart TVs, games consoles, or other closed-infrastructure systems. After all, if you’re going to the trouble of setting up a home media center, why shouldn’t you be able to access it on whatever device you like? It can be installed on Apple TV, PC, Mac, Android smartphone, Nvidia Shield, iOS smartphone, or Linux device.

