With the Cambridge Analytica scandal fresh in everyone’s minds, users might be wondering about the concept of app permissions and other holes that need to be patched. If you’re an iPhone or iPad user, chances are you have at least a few third-party applications.
While these don’t necessarily have access to your data, by default many have access to other features, such as your device’s camera or microphone. Hopefully, the app-makers themselves won’t abuse these powers, although recent accusations against Facebook suggest otherwise. Aside from intentional privacy breaches, you have to wonder about the security of apps in general and how easy it would be for remote access to your device’s applications to fall into the wrong hands.
Unless an app requires access to perform the functions you use it for, it’s a good idea to restrict access by manually adjusting your device settings. This way, each app only has access to what it absolutely needs and you can mitigate the risks posed by enabling free reign of your device.
In this post, we’ll show you how you can check exactly which apps have access to what and how to change those settings. We’ll also provide additional tips for upping your privacy and security when it comes to iOS apps.
Contents [hide]
- How to manage your iPhone or iPad app permissions
- How important is it to manage app permissions?
- How to turn off your location services completely
- How iOS apps request permissions upon and after installation
- How to prevent Apple and app developers collecting your data
- How to prevent Apple tracking you for ad purposes
- How to adjust privacy and security settings in Safari
How to manage your iPhone or iPad app permissions
For the purposes of this article, screenshots will use an iPhone, but the instructions for an iPad will be similar.
There are two ways to manage your app permissions: either through your privacy settings or in the settings of each third-party app itself. Both are simple and we’ll explain each step-by-step.
Managing app permissions in privacy settings
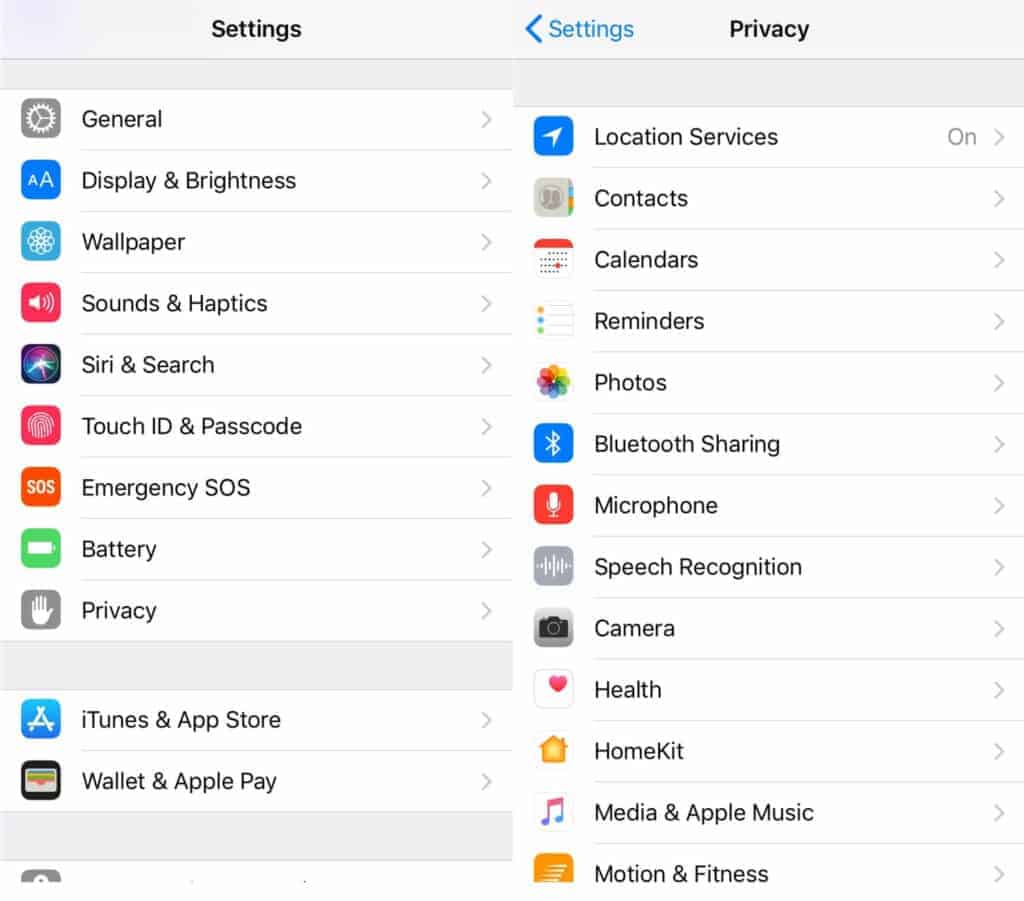
First, go into Settings > Privacy. This will display a list of all of the device applications that any third party app may have access to.
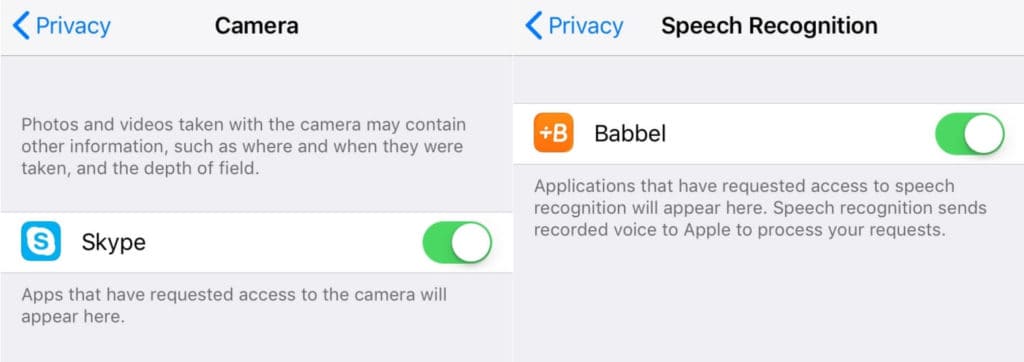
Click on each one to see which apps have access. For example, when I go into Camera, I can see that Skype has access to my device’s camera, and in Speech Recognition, I see my language app, Babbel.
You can use the toggle to disable any access you don’t wish to permit.
Manage permissions for each third-party app
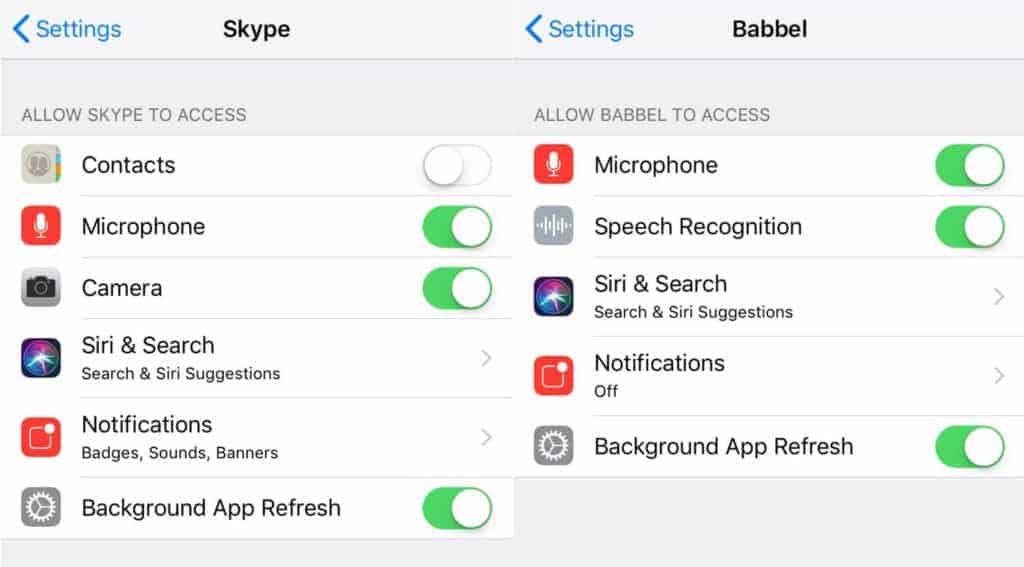
The other option is to find the third party app itself and view all of the device applications it has access to. Go into Settings and scroll all the way down to see a list of third party apps. Click each app to see what it has access to and use the toggle to change as needed.
For example, I want Skype to have access to my microphone and camera but will deny access to my contacts list.
Typically, if you deny access to a necessary device application and then try to use the app, you’ll get a popup asking you to allow access or to adjust your device settings.
How important is it to manage app permissions?
To put things in context, a Google engineer recently demonstrated that it’s possible for any app with access to a device’s camera to spy on you without your knowledge. Sound creepy? The implications of this are pretty terrifying and it doesn’t end at cameras. Apps with access to your microphone could overhear every conversation you have within earshot of your phone.
And what about location settings? When you access your list of device applications using the steps above, you’ll probably find that the location services are among the most requested permissions. Of course, many apps rely on this including maps, weather apps, and browsers (to deliver local results). But others are simply using it to track your every move so they can deliver targeted ads based on your location.
The implications don’t seem like that big of a deal, but they could become dangerous. For example, automatically allowing your camera access to your location services means that every image you take is geo-tagged. If you take and post a lot of pictures, someone could track your daily movements, from where you have lunch to where you work to where you live. What’s more, it was recently shown that anyone could spend just $1,000 and track your movements through location-based ads.
And that’s all without them having to access your device applications. If someone has permission to use your location services through an app, they will know exactly where you are at any given moment.
How to turn off your location services completely
Since so many apps request location service permissions, it may be best to simply turn them off completely when you want to obscure your location.
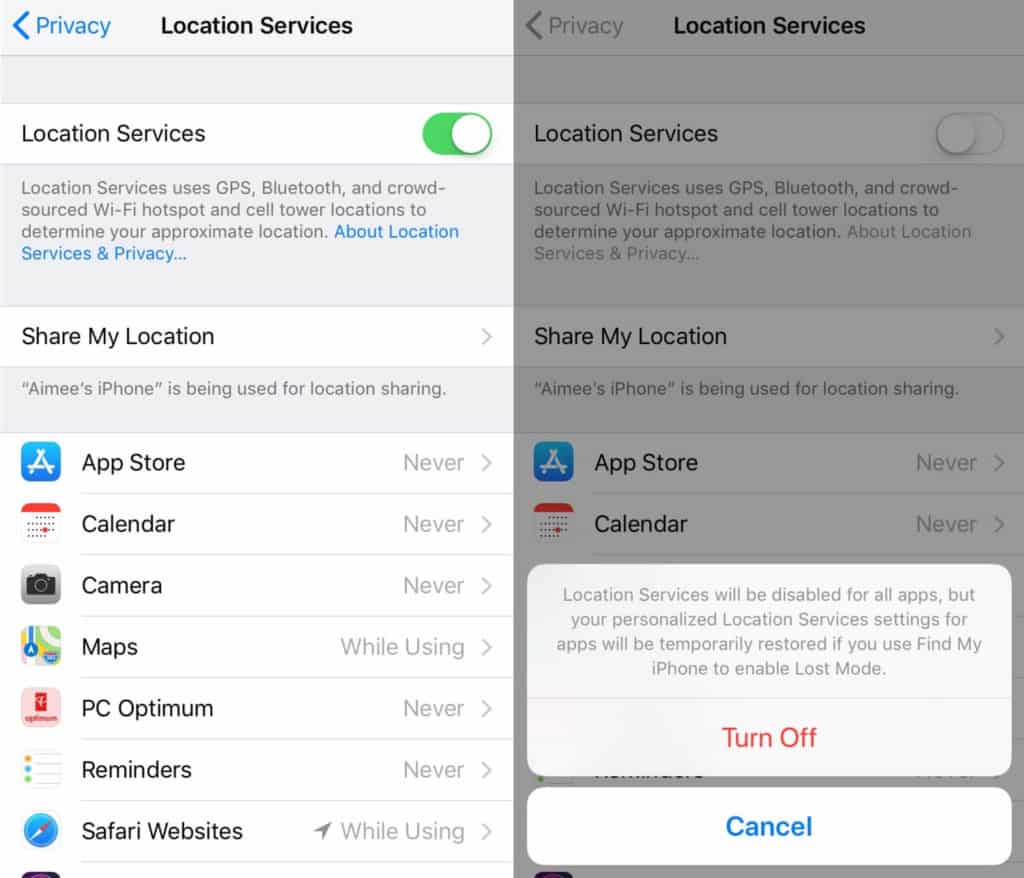
To do this, go to Settings > Privacy > Location Services. Here, you have the option of changing the settings for each individual app or turning off the location services completely. For the latter, simply click the toggle in the top right-hand corner.
You’ll be asked to confirm, in which case you can just click Turn Off.
Of course, you may want to allow certain apps to use your location. In this case, you can simply turn the location services off for certain apps only using the steps we outlined earlier.
How iOS apps request permissions upon and after installation
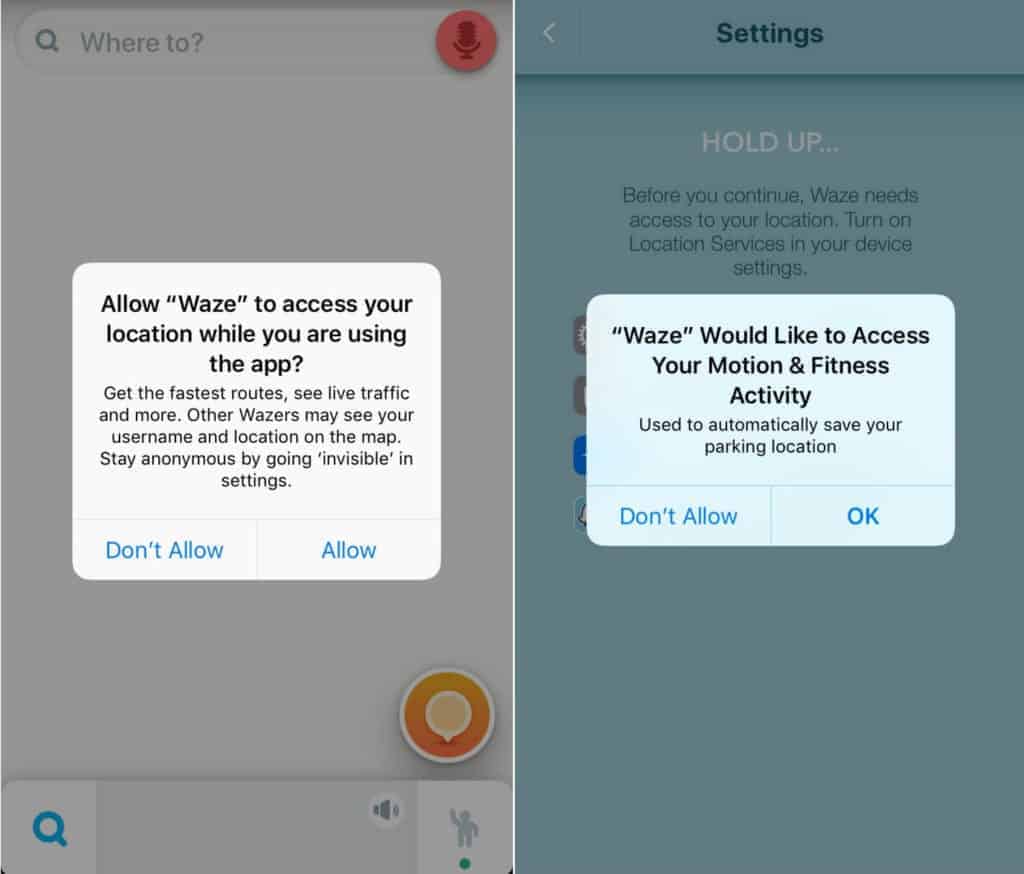
When you first install and launch an iOS app, you will typically be asked (through popups) if the app can access the various device applications it needs — or wants — access to. For example, when launching the Waze map app, you’ll get a popup requesting access to your location while you’re using the app. You’ll also get requests for access to your contacts and motion and fitness activity.
For some applications, there may be multiple requests, and in haste, you may simply select Allow to all, even if some are questionable. That’s not a big deal as you can always change these permissions using the steps above.
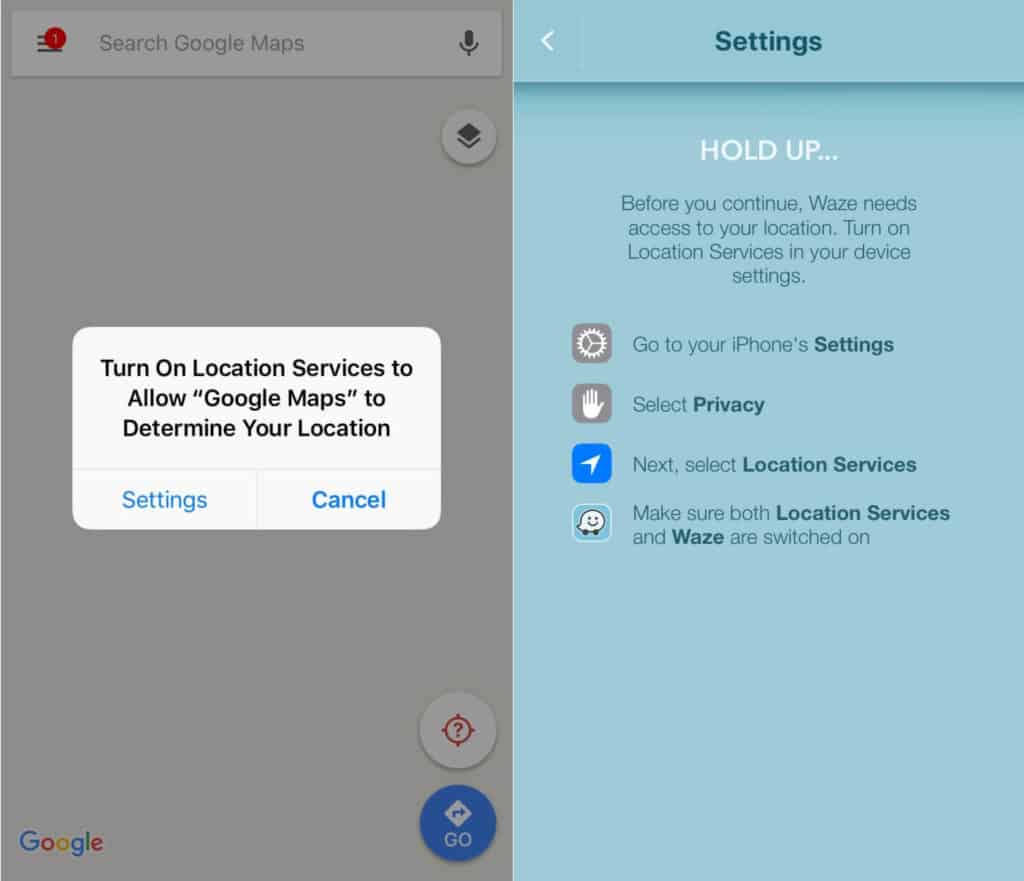
But what if you turn off permissions for a device application that the app needs to function? In this case, when the app needs it, you’ll get a popup that tells you what is needed and a prompt to go into Settings to change the permissions. For example, if I’ve turned off my location service entirely and try to use a map app, I’ll get a popup.
This will prompt me to turn on the location services. Alternatively, if I’ve turned it off for that app, in particular, I’ll need to change those permissions for the app to work.
How to prevent Apple and app developers collecting your data
Aside from security, you may simply want to maintain privacy. Apple collects analytical data from your device to help it “improve its products and services.” This section of the privacy settings used to be called Diagnostics & Usage but has been renamed Analytics, possibly in an attempt at improved transparency. The sharing of analytical information should be disabled by default, but you can check to make sure.
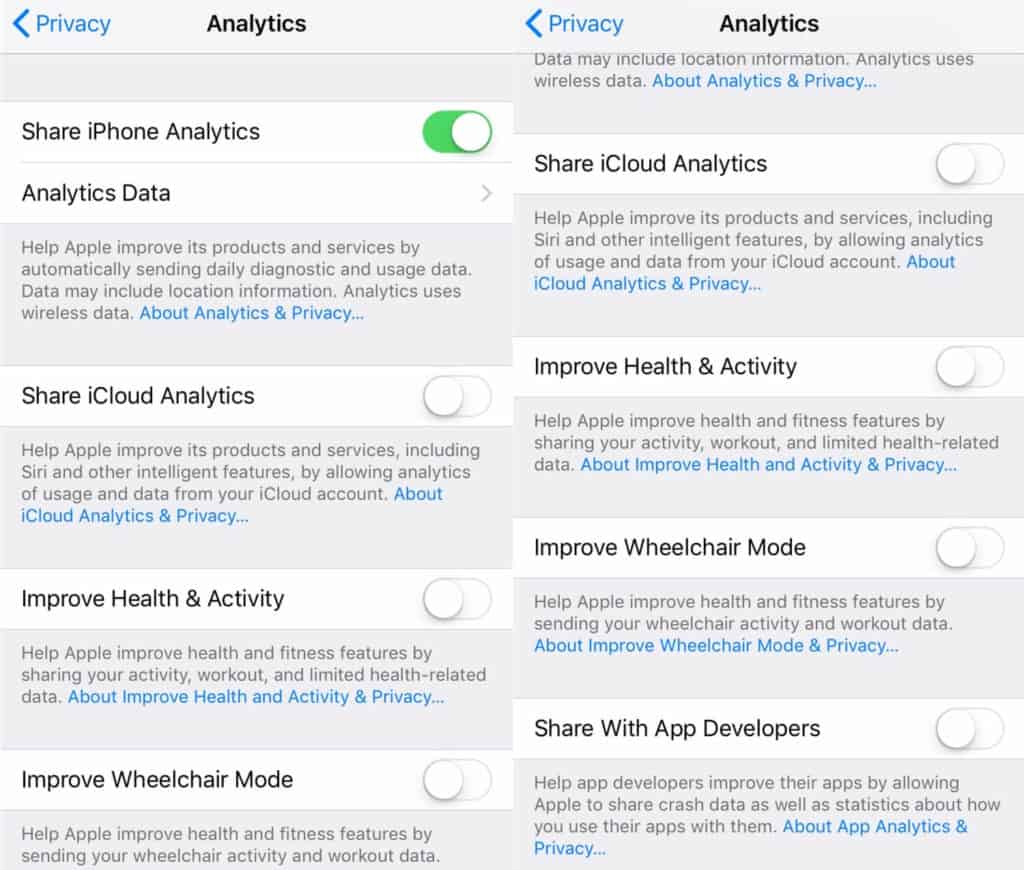
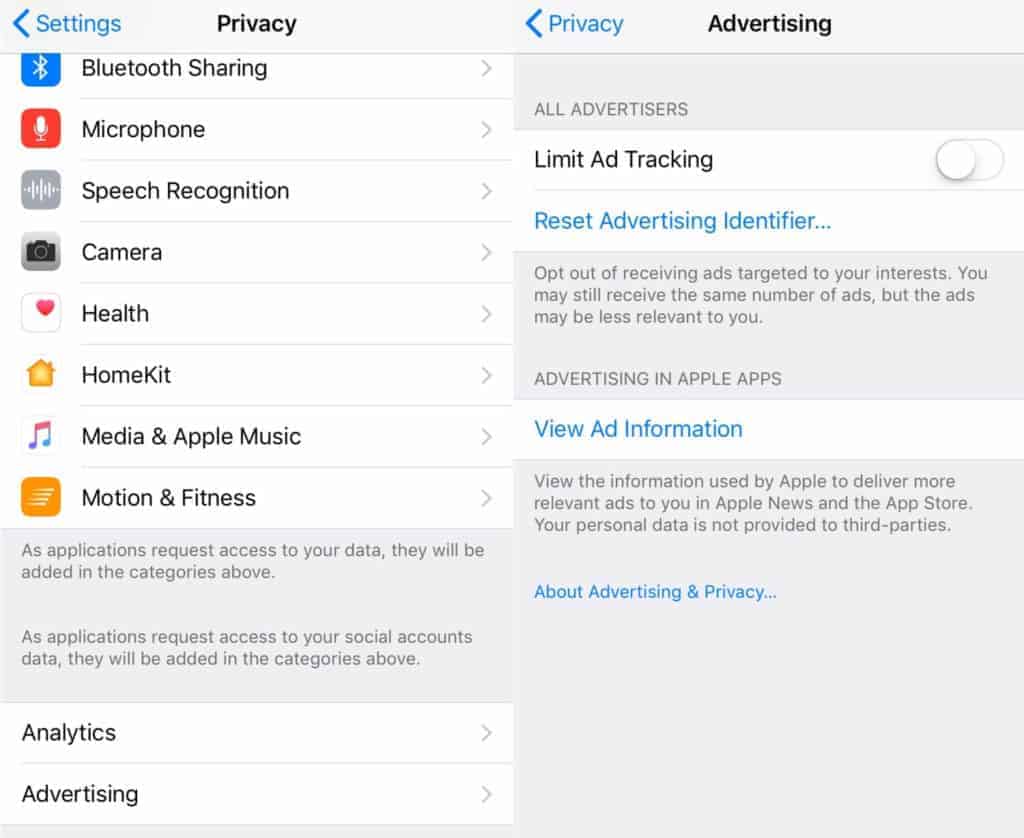
To adjust these settings, go to Settings > Privacy. Below the list of applications, you’ll see two more options, Analytics and Advertising (we’ll get to the advertising part next). Select Analytics and on the next screen you’ll see Share iPhone Analytics, Share iCloud Analytics, Improve Health & Activity, and Improve Wheelchair Mode.
Share iPhone Analytics covers non-personal info about things like the hardware and OS specifications and how you use your device and apps. iCloud analytics are reportedly used to improve intelligent features like Siri.
Although they are named differently with the word “improve,” the health and activity and wheelchair mode options are also there for you to agree to share data. When these are enabled, you allow access to information from health and fitness features, including sex, age, and height, along with motion data and health measurements.
If Share iPhone Analytics is enabled, you’ll also see an option labeled Share With App Developers at the bottom of the screen. Enabling this option will result in Apple sharing certain information that is pertinent to each particular app as well as statistics in relation to how you use the app. Note that none of this information will include Personally Identifiable Information (PII).
If you don’t want Apple to automatically receive all of this analytical data or share it with third parties, simply switch all toggles to the off position.
How to prevent Apple tracking you for ad purposes
Unfortunately, as an iOS user, you’re stuck with seeing ads no matter what. Ads mainly appear in the App Store and Apple Newsfeed. You do have several options when it comes to tracking and the types of ads you’re shown.
We’ll start with tracking. In order to deliver the most relevant ads to you, Apple automatically tracks your browsing habits. To turn off browsing, you can go to Settings > Privacy > Advertising.
Here, it’s a little confusing. Your first option is Limit Ad Tracking, which should be disabled by default. At first glance, this might seem like ad tracking is disabled, but that’s not the case. When you change the toggle to the on (green) position, then you’re stopping tracking from taking place. As Apple explains it:
“Opt out of receiving ads targeted to your interests. You may still receive the same number of ads, but the ads may be less relevant to you.”
Just below, you’ll see Reset Advertising Identifier. Selecting this and confirming will wipe any ad tracking data that has already been collected.
By making these two changes you will have opted out of receiving targeted ads (in the App Store and Apple News) based on your browsing. You can view more details about how Apple uses tracking information to target ads by selecting View Ad Information.
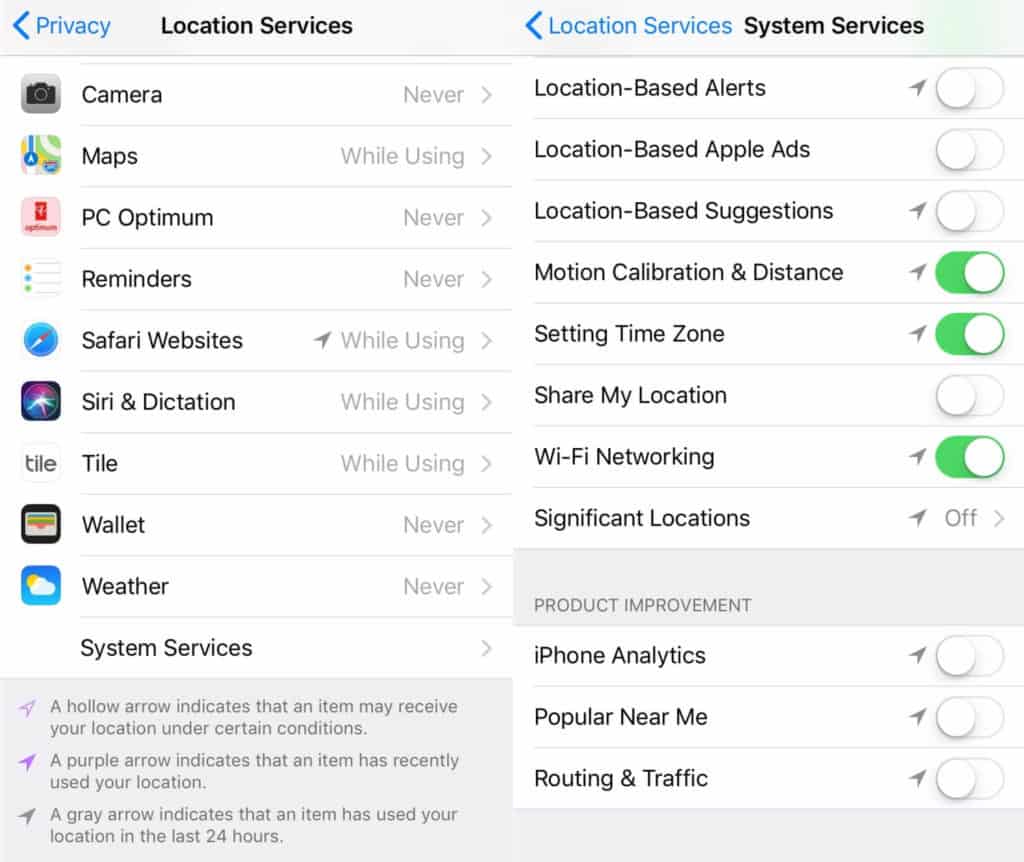
Confusingly, there’s another ad setting you can turn off over in Location Services. Instead of targeting ads based on browsing, this uses your location to decide which ads to serve. Go to Settings > Privacy > Location Services > System Services and look for Location-Based Apple Ads.
If you’d prefer not to see ads based on your current location, you can turn the toggle to the off position. Just below is Location-Based Suggestions which gives app suggestions based on your location, so you may way to turn that off too.
How to adjust privacy and security settings in Safari
Aside from the above privacy and security concerns, the app with perhaps the most capability of invading your privacy is Safari. If you go to Settings > Safari, you’ll see a whole host of settings, including several that are specific to privacy and security.
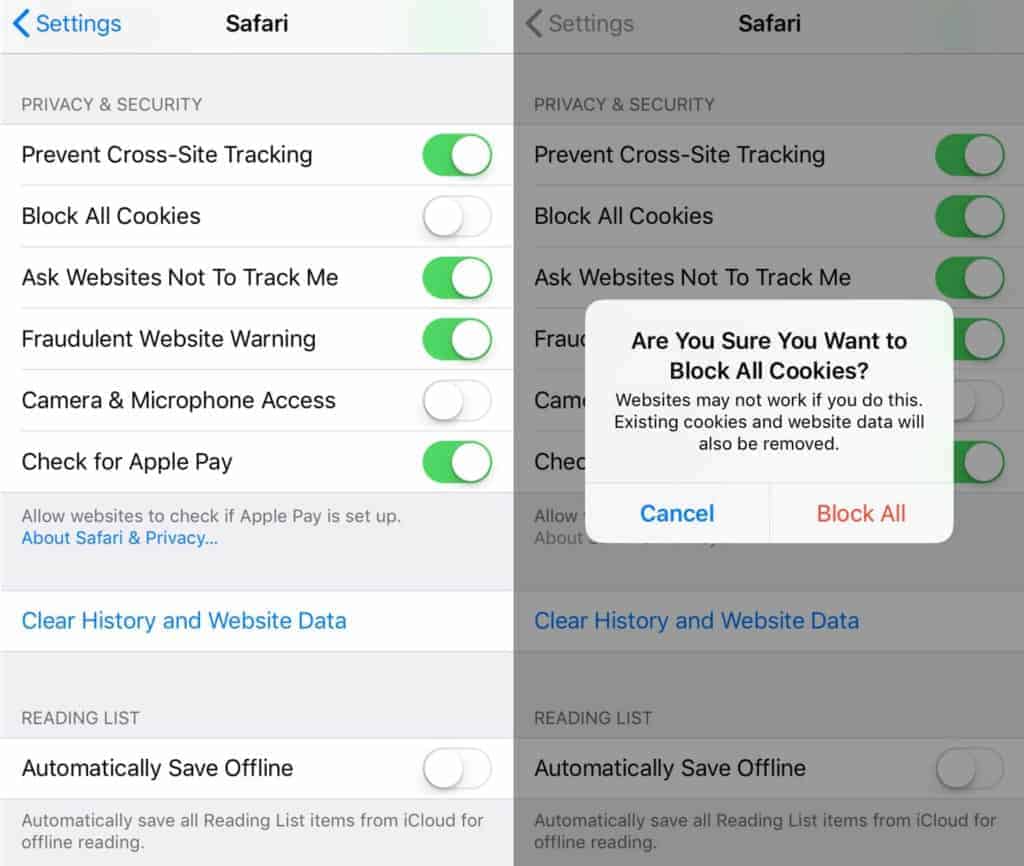
The first one here, Prevent Cross-Site Tracking, is a newer option that stops companies tracking your browsing habits across multiple websites. In turn, this can prevent them from showing you targeted ads.
Again, things can be a little confusing in terms of the wording. For example, turning Block All Cookies to the off position means that cookies will be used. If you turn this one on, you’ll get a warning that some websites may not work properly without cookies.
The other options here are fairly self-explanatory, and the one you’ll most likely want to keep on is the Fraudulent Website Warning that issues a warning if you’re about to visit a suspected phishing site.
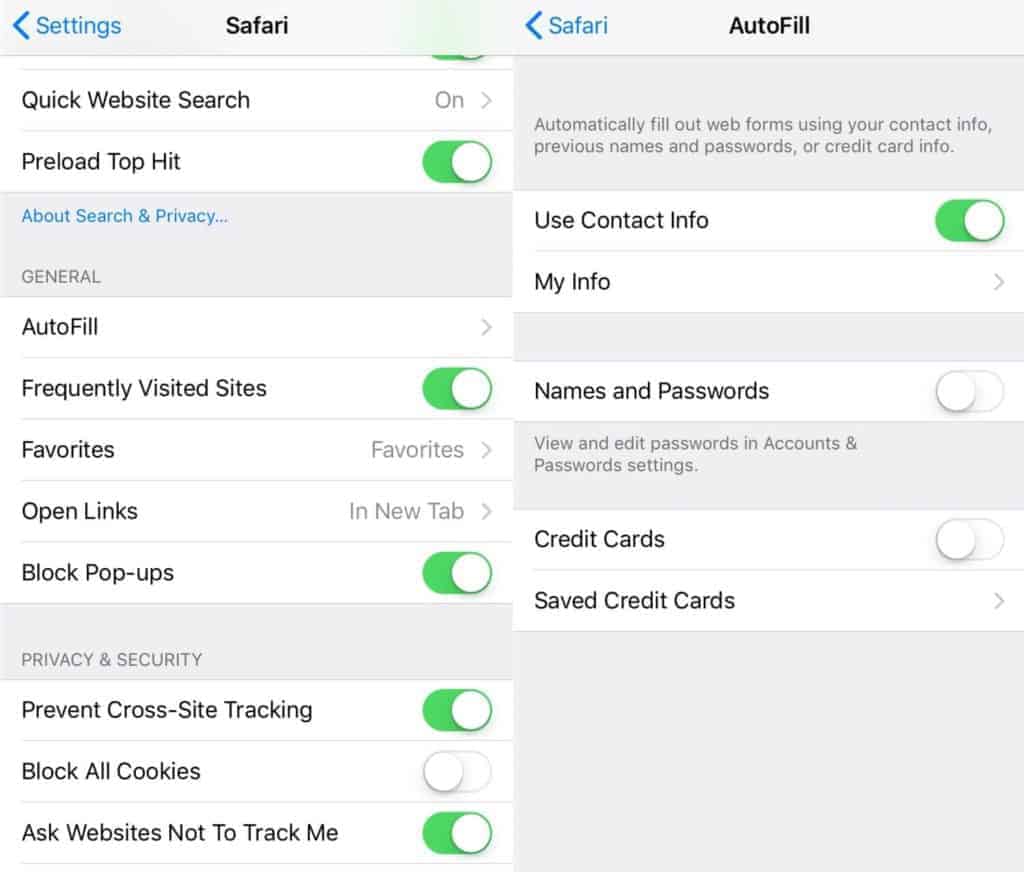
One more important setting under the Safari options pertaining to privacy and security is the AutoFill option. This can be found in the General section just above Privacy & Security.
Here, you can choose whether or not to automatically fill out forms with pre-defined details, including your contact information, names and passwords, and credit card information. Only the contact info should be enabled by default, but it’s worth double-checking the others.
We’ve gone over some of the main privacy and security settings available in terms of limiting access to your device applications and information by Apple and third parties. However, these all pertain to the settings built into the device itself. Other steps you can take to ensure even more privacy and security include encrypting your device’s memory or utilizing a VPN. We go into more detail about these and other security measures in a dedicated post.


